CSS3アニメーションで心地良いモーションを作る|1 pixel|サイバーエージェント公式クリエイターズブログ
http://ameblo.jp/ca-1pixel/entry-11497184837.html
[Windows8]XAMLアニメーションで心地よいモーションを作る
http://blogs.wankuma.com/hatsune/archive/2013/03/29/323879.aspx
つながりで、タップしたときにモーションを付ける方法を紹介しておきます。
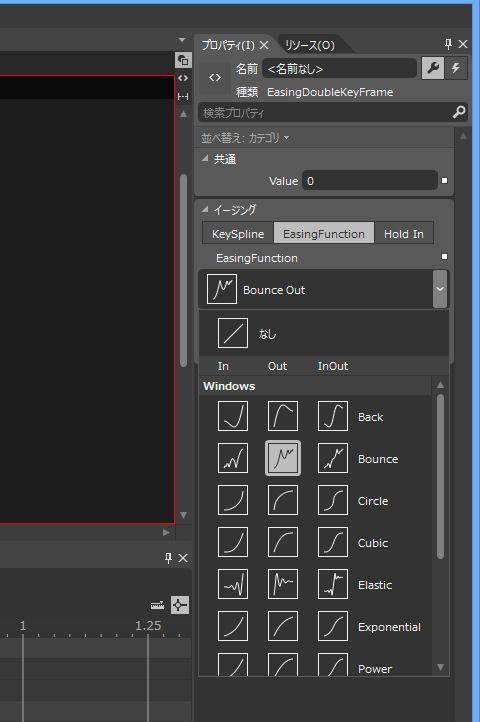
HTML+CSS のパターンはモーションを付けるのに、@keyframes を付けるので、そのまま XAML の Storyboard を使ったときも同じノウハウが使えます…が、XAML の場合には、もうひとつ仕掛けがあって、ばねのような動きがあらかじめ EasingFunction という形で用意されています。
これを使うと「物理的な動きを内部で高速化されたルーチンをつかって手軽に」…という謳い文句を昔聞いたことがあるのですが、高速化されるかどうかはさておき(調べてないので)、ばねとか重力とかそういうのを意識した作りができます。
Easing Function 早見表 にあるのは、Javascript の Easing 処理ですが XAML でも同じことができます。
動きとしては http://youtu.be/Lqhn8DbERlg な感じに作れます。
<Storyboard x:Name="sbBound"> <DoubleAnimationUsingKeyFrames Storyboard.TargetProperty="(UIElement.RenderTransform).(CompositeTransform.ScaleX)" Storyboard.TargetName="ellipse"> <EasingDoubleKeyFrame KeyTime="0:0:0.1" Value="1.2"/> <EasingDoubleKeyFrame KeyTime="0:0:0.5" Value="1"> <EasingDoubleKeyFrame.EasingFunction> <BounceEase/> </EasingDoubleKeyFrame.EasingFunction> </EasingDoubleKeyFrame> </DoubleAnimationUsingKeyFrames> <DoubleAnimationUsingKeyFrames Storyboard.TargetProperty="(UIElement.RenderTransform).(CompositeTransform.ScaleY)" Storyboard.TargetName="ellipse"> <EasingDoubleKeyFrame KeyTime="0:0:0.1" Value="1.2"/> <EasingDoubleKeyFrame KeyTime="0:0:0.5" Value="1"> <EasingDoubleKeyFrame.EasingFunction> <BounceEase/> </EasingDoubleKeyFrame.EasingFunction> </EasingDoubleKeyFrame> </DoubleAnimationUsingKeyFrames> </Storyboard> <Storyboard x:Name="sbRotate"> <DoubleAnimationUsingKeyFrames Storyboard.TargetProperty="(UIElement.RenderTransform).(CompositeTransform.Rotation)" Storyboard.TargetName="ellipse2"> <EasingDoubleKeyFrame KeyTime="0:0:0.1" Value="23.95"/> <EasingDoubleKeyFrame KeyTime="0:0:0.5" Value="0"> <EasingDoubleKeyFrame.EasingFunction> <BounceEase/> </EasingDoubleKeyFrame.EasingFunction> </EasingDoubleKeyFrame> </DoubleAnimationUsingKeyFrames> </Storyboard>
吹き出しの回転は、元ネタのように吹き出しの突起のところに中心を置きたいのですが…ちょっと実力不足で単なる回転で実装しています。参照点を変えられるので、あとからわかったら変更します。
追記、回転の中心点 RenderTransformOrigin を左下のポイントに移動させれば、吹き出しの角で回転できますね。
<Storyboard x:Name="sbRotate"> <DoubleAnimationUsingKeyFrames Storyboard.TargetProperty="(UIElement.RenderTransform).(CompositeTransform.Rotation)" Storyboard.TargetName="ellipse2"> <EasingDoubleKeyFrame KeyTime="0:0:0.1" Value="-16.163"/> <EasingDoubleKeyFrame KeyTime="0:0:0.5" Value="0"> <EasingDoubleKeyFrame.EasingFunction> <ElasticEase/> </EasingDoubleKeyFrame.EasingFunction> </EasingDoubleKeyFrame> </DoubleAnimationUsingKeyFrames> <PointAnimationUsingKeyFrames EnableDependentAnimation="True" Storyboard.TargetProperty="(UIElement.RenderTransformOrigin)" Storyboard.TargetName="ellipse2"> <EasingPointKeyFrame KeyTime="0" Value="0,1"/> </PointAnimationUsingKeyFrames> </Storyboard>
■これをボタンに適用するのはどうやるのか?
円とか吹き出しは普通に Tapped イベントで拾ってきます。Mouse イベントで拾うとタブレットPCでタップをしたときにイベントが拾えなくなるので、Tapped イベントを使いましょう。
<Ellipse x:Name="ellipse"
Tapped="Ellipse_Tapped_1"
Fill="#FFF4F4F5" HorizontalAlignment="Left" Height="166" Margin="221,210,0,0" Stroke="Black" VerticalAlignment="Top" Width="166" RenderTransformOrigin="0.5,0.5">
<Ellipse.RenderTransform>
<CompositeTransform/>
</Ellipse.RenderTransform>
</Ellipse>
デスクトップPCの場合は、これにマウスの hover を付けないといけないのですが、タブレットPCの場合はこのままで十分です。が、動かしてみると問題があって、Tapped イベントだと、タップして指を離したときに(マウスを離したときに)イベントが発生するので、押した瞬間にアニメーションしたい場合は、PointerPressed イベントのほうを使います。このあたり、深みにはまると本格的なボタン作りになってしまうので、アプリごとに使い分けるのがよいかと。
■複数のボタンに割り当てる場合にはどうするのか?
これ、XAML の Storyboard の問題で、アニメーションのターゲットがひとつしか選択できません。なので、複数のボタンを画面に並べる場合は、Storyboard 部分を手作業でコピーして Storyboard.TargetName を書き換えるか、<a href=”http://www.moonmile.net/blog/archives/4087″>[WinRT] Storyboard.Clone を作る </a> のようにクローンを作ります。Silverlight や WPF の場合には Clone メソッドが用意されているですが、何故か WinRT には Clone メソッドがないので拡張メソッドとして自作します。これはいずれ、きれいに直して nuget あたりにアップします。
先の記事にある開始点、終了点を指定するとか、アニメーションの長さを指定するとかあるので、バリエーションが多く出てくると思いますが、そのあたりはアプリごとに作ったいったほうが手間は少ないかと。KeyFrames の位置が固定ってのが難点ですが。