以前 独自にポートフォワード作成し、ラズパイの MySQL へ LINQ で接続する で SSH ポートフォワードを使って MySQL に接続したのだが、これをもうちょっと活用すると、.NET Core で作成した ASP.NET MVC から Redmine の MySQL を閲覧できるようになる。
主な手順
- Redmine テーブルの EF を用意する
- ASP.NET MVC のひな形を .NET Core で作る
- ASP.NET MVC に EF をコピーする
- ASP.NET MVC のスキャフォード機能を使って、Controller と 各種の View を自動生成する。
- 動作時は、SSH ポートフォワードで、実運用の Redmine + MySQL に接続させる
ASP.NET MVC で利用する EF は直接 MySQL から作成してもよいのだけど、何かと面倒なので手作業で作るか、あらかじめ SQL Server で作ったものを用意する。
EF のモデルクラスを作成する
Visual Studio から EF を作成するほうが楽なので、”ADO.NET Entity Data Model” を追加して、SQL Server 上に作成した Redmine のテーブルから、モデルクラスを作成する。
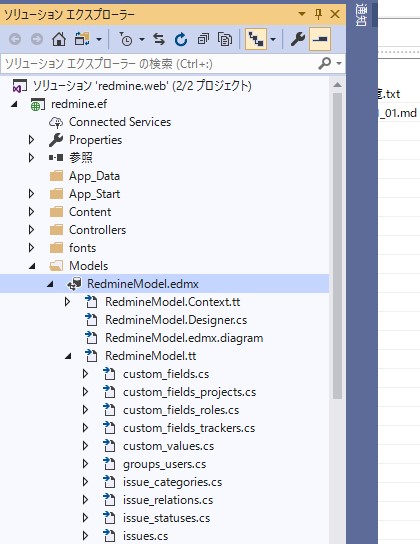
必要なのは、RedmineModel.tt 配下にある *.cs のクラスで、たとえばチケットを管理している issues クラスはこんな感じになる。
public partial class issues
{
    public int id { get; set; }
    public int tracker_id { get; set; }
    public int project_id { get; set; }
    public string subject { get; set; }
    public string description { get; set; }
    public Nullable<System.DateTime> due_date { get; set; }
    public Nullable<int> category_id { get; set; }
    public int status_id { get; set; }
    public Nullable<int> assigned_to_id { get; set; }
    public int priority_id { get; set; }
    public Nullable<int> fixed_version_id { get; set; }
    public int author_id { get; set; }
    public int lock_version { get; set; }
    public Nullable<System.DateTime> created_on { get; set; }
    public Nullable<System.DateTime> updated_on { get; set; }
    public Nullable<System.DateTime> start_date { get; set; }
    public int done_ratio { get; set; }
    public Nullable<double> estimated_hours { get; set; }
    public Nullable<int> parent_id { get; set; }
    public Nullable<int> root_id { get; set; }
    public Nullable<int> lft { get; set; }
    public Nullable<int> rgt { get; set; }
    public bool is_private { get; set; }
    public Nullable<System.DateTime> closed_on { get; set; }
}
ASP.NET MVC Core のひな形を作る
コマンドラインから、以下のように作成する。
dotnet new mvc -n redmine.web
VSCode を使ってもよいのだけど、スキャフォード機能を使う場合、Visual Studio 2019 を使ったほうがよいので、*.sln ファイルも作っておく。
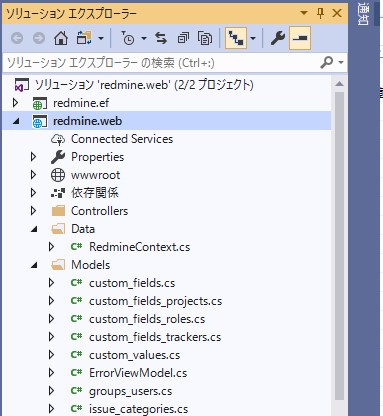
EF のモデルクラスをコピーする
先のプロジェクトで作成したモデルクラスを ASP.NET MVC の Models フォルダーにコピーする。
注意しないといけないのは、Redmine では tinyint(1) をフラグ代わりに使っているので、これを bool 型で扱うか? int 型で扱うかという問題がある。本来はチェックボックスにしたいので bool 型にしたいところなのだが、ひとまず int 型にしておく。
public partial class issues
{
    public int id { get; set; }
    public int tracker_id { get; set; }
    public int project_id { get; set; }
    public string subject { get; set; }
    public string description { get; set; }
    public Nullable<System.DateTime> due_date { get; set; }
    public Nullable<int> category_id { get; set; }
    public int status_id { get; set; }
    public Nullable<int> assigned_to_id { get; set; }
    public int priority_id { get; set; }
    public Nullable<int> fixed_version_id { get; set; }
    public int author_id { get; set; }
    public int lock_version { get; set; }
    public Nullable<System.DateTime> created_on { get; set; }
    public Nullable<System.DateTime> updated_on { get; set; }
    public Nullable<System.DateTime> start_date { get; set; }
    public int done_ratio { get; set; }
    public Nullable<double> estimated_hours { get; set; }
    public Nullable<int> parent_id { get; set; }
    public Nullable<int> root_id { get; set; }
    public Nullable<int> lft { get; set; }
    public Nullable<int> rgt { get; set; }
    public int is_private { get; set; }
    public Nullable<System.DateTime> closed_on { get; set; }
}
データベースの接続情報やデータアクセスを LINQ で使えるようにするため、DbContext を継承した RedmineContext クラスを作る。
namespace redmine.web.Data
{
    public class RedmineContext : DbContext
    {
        public RedmineContext(DbContextOptions<RedmineContext> options)
            : base(options)
        {
        }

        protected override void OnConfiguring(DbContextOptionsBuilder optionsBuilder)
        {
            base.OnConfiguring(optionsBuilder);
        }
    }
}
NuGetで MySql.Data.EntityFrameworkCore を入れた後、
Startup.cs を開いて、MySQL への接続文字列を ConfigureServices メソッド内に書く。
public class Startup
{
    public Startup(IConfiguration configuration)
    {
        Configuration = configuration;
    }

    public IConfiguration Configuration { get; }

    // This method gets called by the runtime. Use this method to add services to the container.
    public void ConfigureServices(IServiceCollection services)
    {
        services.Configure<CookiePolicyOptions>(options =>
        {
            // This lambda determines whether user consent for non-essential cookies is needed for a given request.
            options.CheckConsentNeeded = context => true;
            options.MinimumSameSitePolicy = SameSiteMode.None;
        });

        services.AddDbContext<redmine.web.Data.RedmineContext>(options =>
            options.UseMySQL(@"server=localhost;user id=redmine;password=redmine;database=redmine;port=3306;sslmode=None");
        });

        services.AddMvc().SetCompatibilityVersion(CompatibilityVersion.Version_2_2);
    }
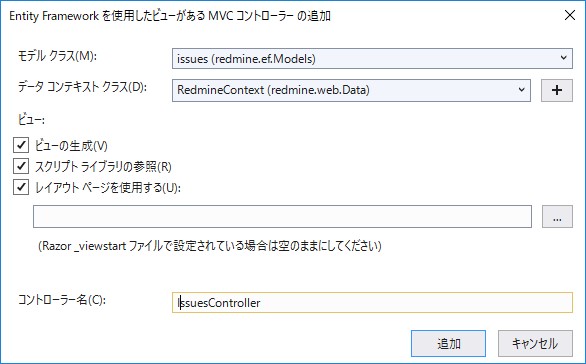
スキャフォード機能で Controller と View を作る
ひとまずローカルの MySQLに接続して確認する
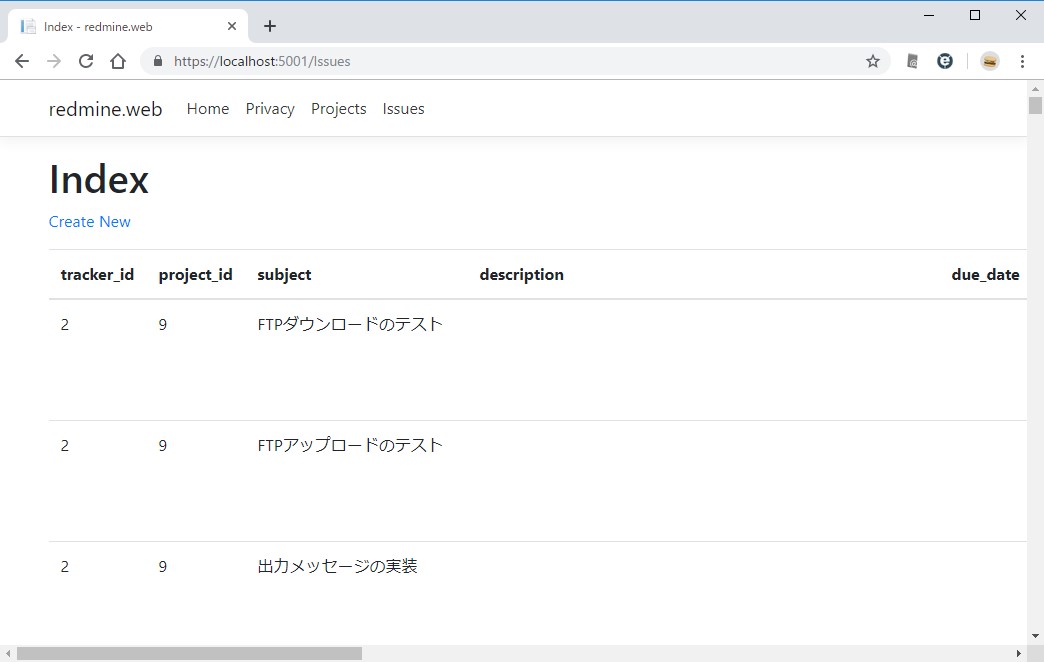
Visual Studio からデバッグ実行すると、デバッグ用のコマンドラインが表示されて、localhost:5000 へ接続できるようになる。
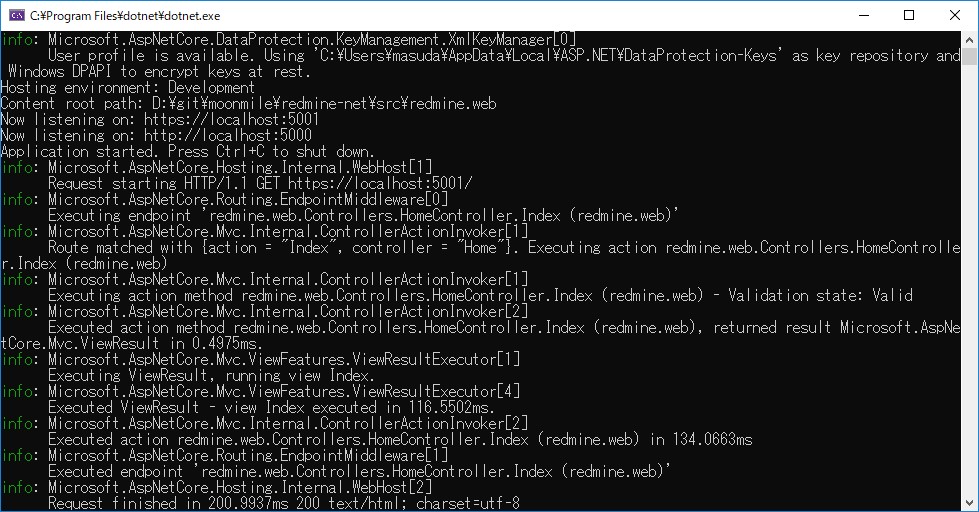
https://localhost:5001/Issues のようにアクセスすると、MySQL の中身が表示される。Issue の一覧になるので、すべてのプロジェクトの Issue がまとめて表示されてしまうが、これは独自にルーティングを使ってプロジェクト内のみ表示させればよい。
SSH ポートフォワードを使う
options.UseMySQL で記述した接続先を SSH ポートフォワード用に変更すればよいのだが、ひとまず SSH で繋がるかどうかを MySQL Workbench で接続してみる
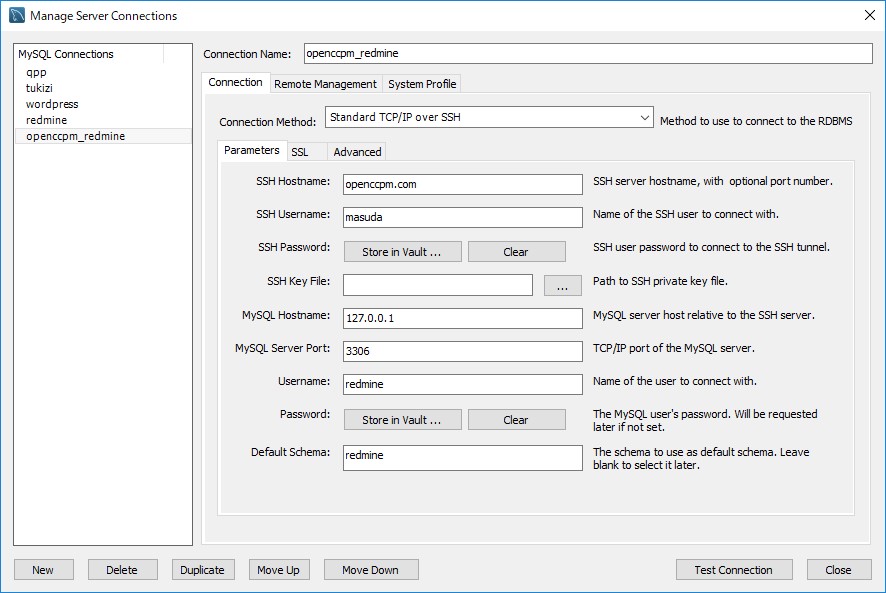
Connection Method を “Standard TCP/IP over SSH” に変更して SSH 経由で接続できることを確認しておく。
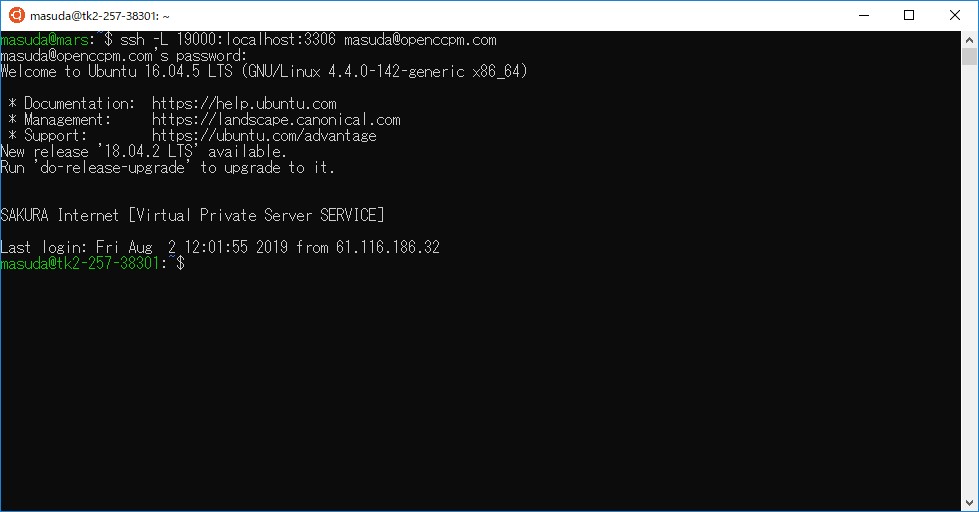
その後で、Ubuntu on Windows で、localhost の 190000番を openccpm.com 内部にある MySQL(3306) に通すようにする。
ssh -L 19000:localhost:3306 masuda@openccpm.com
Setup.cs の該当箇所を書き換える
services.AddDbContext<redmine.web.Data.RedmineContext>(options =>
{
    options.UseMySQL(@"server=localhost;user id=redmine;password=redmine;database=redmine;port=19000;sslmode=None");
});
Visual Studio 2019 からデバッグ実行できれば ok.