Windows Remote Arduino を利用して Arduino 戦車を動かす | Moonmile Solutions Blog
http://www.moonmile.net/blog/archives/7168
では、Windows がオープンソース化している Firmata ライブラリを利用して Arduino に接続したわけですが、Firmata プロトコル自体は公開されているので、どのような言語でも誰でも作れます。
firmata/arduino
https://github.com/firmata/arduino
github の readme を眺めると、.NET 実装もあります。ソースを見ていくと COM 経由で Arduino に USB ケーブルを刺して使うライブラリになっていますが、これをちょっと修正すれば Bluetooth のシリアル通信対応にできますよね。ということで、Bluetooth 2.0 のシリアル通信である RFCOMM を使って書き換えていきます。
Firmata.NET | imagitronics.org
http://www.imagitronics.org/projects/firmatanet/
2 つある中では、Firmata.NET のほうがコードが短かったので、これを利用します。このコードを使って、Android 上から Firmata を通して Arduino を操作できるようにしましょう。確か、ブラウザや Node.js から使うパターンが多いのですが、Xamarin.Android から C# で扱えるとネイティブアプリとして作れるので便利でしょう。ちなみに、コード自体は、短いので Xamarin の Starter 版(無償版)でも動作確認ができました。無償版の場合 128KB 制限なので、そのなかで収まっていると思われます(正確な大きさはわからない)。
RFCOMM 版の Firmata を作る
ざっくりと移植したのが以下です。Android の Bluetooth を使うために、BluetoothAdapter.DefaultAdapter を利用しています。
class Arduino
{
public static int INPUT = 0;
public static int OUTPUT = 1;
public static int LOW = 0;
public static int HIGH = 1;
private const int MAX_DATA_BYTES = 32;
private const int DIGITAL_MESSAGE = 0x90; // send data for a digital port
private const int ANALOG_MESSAGE = 0xE0; // send data for an analog pin (or PWM)
private const int REPORT_ANALOG = 0xC0; // enable analog input by pin #
private const int REPORT_DIGITAL = 0xD0; // enable digital input by port
private const int SET_PIN_MODE = 0xF4; // set a pin to INPUT/OUTPUT/PWM/etc
private const int REPORT_VERSION = 0xF9; // report firmware version
private const int SYSTEM_RESET = 0xFF; // reset from MIDI
private const int START_SYSEX = 0xF0; // start a MIDI SysEx message
private const int END_SYSEX = 0xF7; // end a MIDI SysEx message
// private SerialPort _serialPort;
private int delay;
private int waitForData = 0;
private int executeMultiByteCommand = 0;
private int multiByteChannel = 0;
private int[] storedInputData = new int[MAX_DATA_BYTES];
private bool parsingSysex;
private int sysexBytesRead;
private volatile int[] digitalOutputData = { 0, 0, 0, 0, 0, 0, 0, 0, 0, 0, 0, 0, 0, 0, 0, 0 };
private volatile int[] digitalInputData = { 0, 0, 0, 0, 0, 0, 0, 0, 0, 0, 0, 0, 0, 0, 0, 0 };
private volatile int[] analogInputData = { 0, 0, 0, 0, 0, 0, 0, 0, 0, 0, 0, 0, 0, 0, 0, 0 };
private int majorVersion = 0;
private int minorVersion = 0;
// private Thread readThread = null;
private object locker = new object();
/*
Guid serviceGuid = Guid.Parse("00001101-0000-1000-8000-00805f9b34fb");
RfcommDeviceService rfcommService;
StreamSocket socket;
DataWriter writer;
DataReader reader;
*/
BluetoothSocket _socket;
/// <summary>
///
/// </summary>
/// <param name="serialPortName">String specifying the name of the serial port. eg COM4</param>
/// <param name="baudRate">The baud rate of the communication. Default 115200</param>
/// <param name="autoStart">Determines whether the serial port should be opened automatically.
/// use the Open() method to open the connection manually.</param>
/// <param name="delay">Time delay that may be required to allow some arduino models
/// to reboot after opening a serial connection. The delay will only activate
/// when autoStart is true.</param>
public Arduino(string serialPortName, Int32 baudRate, bool autoStart, int delay)
{
/*
_serialPort = new SerialPort(serialPortName, baudRate);
_serialPort.DataBits = 8;
_serialPort.Parity = Parity.None;
_serialPort.StopBits = StopBits.One;
*/
if (autoStart)
{
this.delay = delay;
this.Connect();
this.Open();
}
}
/// <summary>
/// Creates an instance of the Arduino object, based on a user-specified serial port.
/// Assumes default values for baud rate (115200) and reboot delay (8 seconds)
/// and automatically opens the specified serial connection.
/// </summary>
/// <param name="serialPortName">String specifying the name of the serial port. eg COM4</param>
public Arduino(string serialPortName) : this(serialPortName, 115200, true, 8000) { }
/// <summary>
/// Creates an instance of the Arduino object, based on user-specified serial port and baud rate.
/// Assumes default value for reboot delay (8 seconds).
/// and automatically opens the specified serial connection.
/// </summary>
/// <param name="serialPortName">String specifying the name of the serial port. eg COM4</param>
/// <param name="baudRate">Baud rate.</param>
public Arduino(string serialPortName, Int32 baudRate) : this(serialPortName, baudRate, true, 8000) { }
/// <summary>
/// Creates an instance of the Arduino object using default arguments.
/// Assumes the arduino is connected as the HIGHEST serial port on the machine,
/// default baud rate (115200), and a reboot delay (8 seconds).
/// and automatically opens the specified serial connection.
/// </summary>
public Arduino() : this(Arduino.list().ElementAt(list().Length - 1), 115200, false, 8000) { }
public void Connect()
{
BluetoothAdapter adapter = BluetoothAdapter.DefaultAdapter;
if (adapter == null)
{
throw new Exception("No Bluetooth adapter found.");
}
if (!adapter.IsEnabled)
{
throw new Exception("Bluetooth adapter is not enabled.");
}
BluetoothDevice device = (from bd in adapter.BondedDevices
where bd.Name == "HC-06"
select bd).FirstOrDefault();
if (device == null)
{
throw new Exception("Named device not found.");
}
_socket = device.CreateRfcommSocketToServiceRecord(UUID.FromString("00001101-0000-1000-8000-00805f9b34fb"));
_socket.Connect();
return;
}
/// <summary>
/// Opens the serial port connection, should it be required. By default the port is
/// opened when the object is first created.
/// </summary>
public void Open()
{
// _serialPort.Open();
// Thread.Sleep(delay);
byte[] command = new byte[2];
for (int i = 0; i < 6; i++)
{
command[0] = (byte)(REPORT_ANALOG | i);
command[1] = (byte)1;
// _serialPort.Write(command, 0, 2);
_socket.OutputStream.Write(command, 0, command.Length);
}
for (int i = 0; i < 2; i++)
{
command[0] = (byte)(REPORT_DIGITAL | i);
command[1] = (byte)1;
// _serialPort.Write(command, 0, 2);
_socket.OutputStream.Write(command, 0, command.Length);
}
command = null;
/*
if (readThread == null)
{
readThread = new Thread(processInput);
readThread.Start();
}
*/
}
/// <summary>
/// Closes the serial port.
/// </summary>
public void Close()
{
// readThread.Join(500);
// readThread = null;
// _serialPort.Close();
_socket.Close();
_socket = null;
}
/// <summary>
/// Lists all available serial ports on current system.
/// </summary>
/// <returns>An array of strings containing all available serial ports.</returns>
public static string[] list()
{
// return SerialPort.GetPortNames();
return new string[] { "HC-06" };
}
/// <summary>
/// Returns the last known state of the digital pin.
/// </summary>
/// <param name="pin">The arduino digital input pin.</param>
/// <returns>Arduino.HIGH or Arduino.LOW</returns>
public int digitalRead(int pin)
{
return (digitalInputData[pin >> 3] >> (pin & 0x07)) & 0x01;
}
/// <summary>
/// Returns the last known state of the analog pin.
/// </summary>
/// <param name="pin">The arduino analog input pin.</param>
/// <returns>A value representing the analog value between 0 (0V) and 1023 (5V).</returns>
public int analogRead(int pin)
{
return analogInputData[pin];
}
/// <summary>
/// Sets the mode of the specified pin (INPUT or OUTPUT).
/// </summary>
/// <param name="pin">The arduino pin.</param>
/// <param name="mode">Mode Arduino.INPUT or Arduino.OUTPUT.</param>
public void pinMode(int pin, int mode)
{
byte[] message = new byte[3];
message[0] = (byte)(SET_PIN_MODE);
message[1] = (byte)(pin);
message[2] = (byte)(mode);
// _serialPort.Write(message, 0, 3);
_socket.OutputStream.Write(message, 0, message.Length);
message = null;
}
/// <summary>
/// Write to a digital pin that has been toggled to output mode with pinMode() method.
/// </summary>
/// <param name="pin">The digital pin to write to.</param>
/// <param name="value">Value either Arduino.LOW or Arduino.HIGH.</param>
public void digitalWrite(int pin, int value)
{
int portNumber = (pin >> 3) & 0x0F;
byte[] message = new byte[3];
if (value == 0)
digitalOutputData[portNumber] &= ~(1 << (pin & 0x07));
else
digitalOutputData[portNumber] |= (1 << (pin & 0x07));
message[0] = (byte)(DIGITAL_MESSAGE | portNumber);
message[1] = (byte)(digitalOutputData[portNumber] & 0x7F);
message[2] = (byte)(digitalOutputData[portNumber] >> 7);
// _serialPort.Write(message, 0, 3);
_socket.OutputStream.Write(message, 0, message.Length);
}
/// <summary>
/// Write to an analog pin using Pulse-width modulation (PWM).
/// </summary>
/// <param name="pin">Analog output pin.</param>
/// <param name="value">PWM frequency from 0 (always off) to 255 (always on).</param>
public void analogWrite(int pin, int value)
{
byte[] message = new byte[3];
message[0] = (byte)(ANALOG_MESSAGE | (pin & 0x0F));
message[1] = (byte)(value & 0x7F);
message[2] = (byte)(value >> 7);
// _serialPort.Write(message, 0, 3);
_socket.OutputStream.Write(message, 0, message.Length);
}
private void setDigitalInputs(int portNumber, int portData)
{
digitalInputData[portNumber] = portData;
}
private void setAnalogInput(int pin, int value)
{
analogInputData[pin] = value;
}
private void setVersion(int majorVersion, int minorVersion)
{
this.majorVersion = majorVersion;
this.minorVersion = minorVersion;
}
/*
private int available()
{
return _serialPort.BytesToRead;
}
*/
} // End Arduino class
接続あたりは、
Android から Bluetooth+RFCOMM を利用してモーター制御をする | Moonmile Solutions Blog
http://www.moonmile.net/blog/archives/6826
と同じように書いています。独自に RFCOMM を使った場合は自前で Android/Arduino のプロトコルを作らなければいけませんが(とはいえ、自分の場合は 8 バイト固定にしてあるの簡単)、Firmata プロトコルを使うと、GPIO 等をそのまま使う分には手軽です。
バイナリ送信をしているとこもそのまま移植。今回はテスト的なものなので、Android の受信側は省略しました。もうちょっと整理して、そのうち github へ。
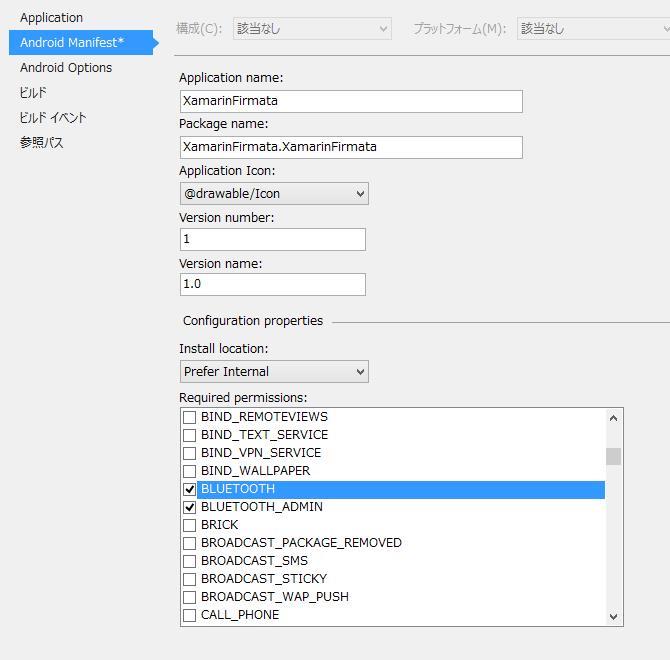
マニフェストを設定する
Bluetooth を扱うので、パーミッションを設定しておきます。
たぶん、”BLUETOOTH” だけチェックすれば ok です。
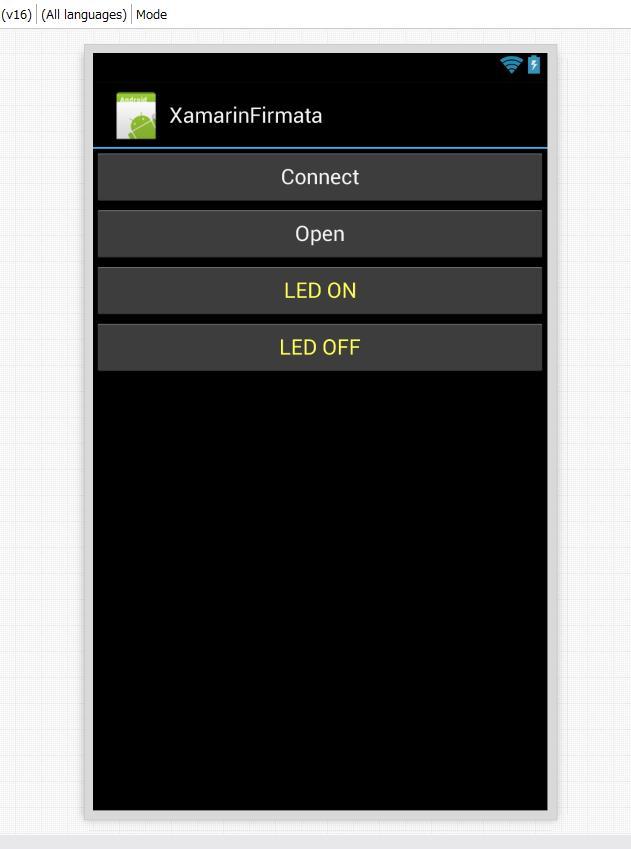
UI と MainActivity
こんな画面を作っておきます。
5ピンに LED をつけるので、pinMode などを設定します。
public class MainActivity : Activity
{
    Arduino arduino;
    protected override void OnCreate(Bundle bundle)
    {
        base.OnCreate(bundle);

        // Set our view from the "main" layout resource
        SetContentView(Resource.Layout.Main);

        // Get our button from the layout resource,
        // and attach an event to it
        arduino = new Arduino();
        FindViewById<Button>(Resource.Id.buttonConnect).Click += (s, e) => {
            arduino.Connect();
            FindViewById<Button>(Resource.Id.buttonConnect).Text = "connected.";
        };
        FindViewById<Button>(Resource.Id.buttonOpen).Click += (s, e) => {
            arduino.Open();
            FindViewById<Button>(Resource.Id.buttonOpen).Text = "Firmata opend";
            arduino.pinMode(5, Arduino.OUTPUT);
            arduino.digitalWrite(5, Arduino.LOW);
        };

        FindViewById<Button>(Resource.Id.buttonLEDon).Click += OnClickLedOn;
        FindViewById<Button>(Resource.Id.buttonLEDoff).Click += OnClickLedOff;
    }

    void OnClickLedOn(object sender, EventArgs e)
    {
        arduino.digitalWrite(5, Arduino.HIGH);
    }
    void OnClickLedOff(object sender, EventArgs e)
    {
        arduino.digitalWrite(5, Arduino.LOW);
    }
}
Connect と Open は同時にやってもいいと思います。RFCOMM へのアクセスを Sync のほうの非同期関数を使えばよかったのですが、ひとまず同期的に作っています。まあ、受信回り(温度や湿度データとか)をきちんと作って、await/async を使えば結構すっきりするハズです。
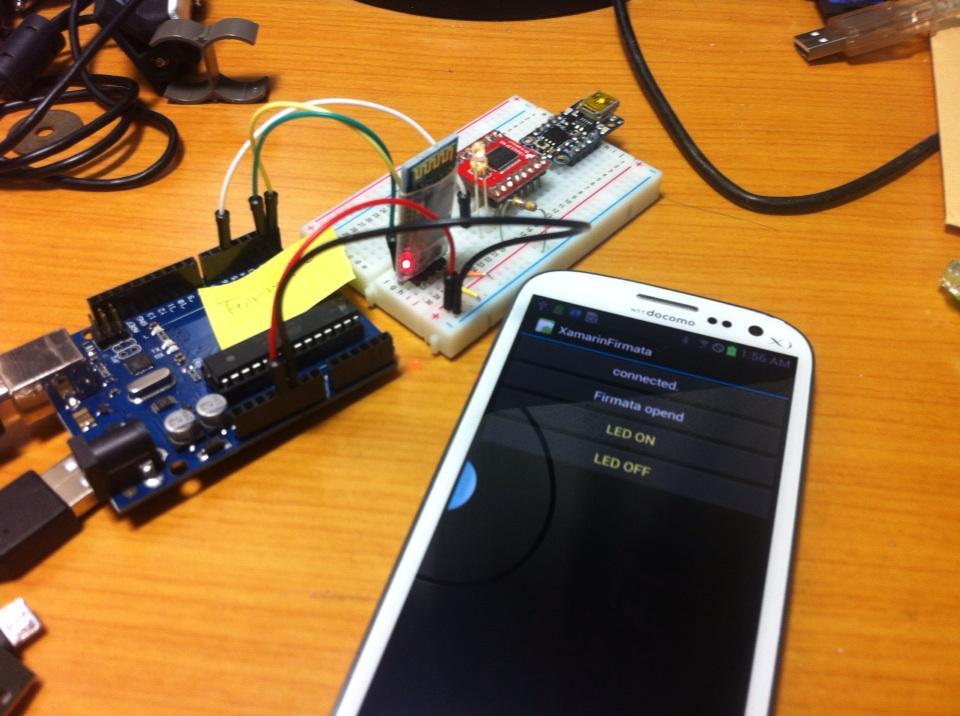
実行してみる
ビルドをして実機で実行してみます。うちの Android は 4.1.2 という古いタイプなのですが正常に動作しました。Bluetooth 経由なので、アクセスポイントとかが必要ないので戸外でも使えますよね。まあ、戸外で使って、どうということはないのですが。
これはこれで整理して、後で Arduino 戦車も動かせるように組み直しいきましょう。あと、適当な距離センサーや加速度センサーを付けて、値をとれるようにいておきます。