Android Things 上で Xamarin.Android を動かして F# を使う | Moonmile Solutions Blog
http://www.moonmile.net/blog/archives/8451
ここから暫く経ってしまいましたが、Android Things + Xamarin.Android の組み合わせでLチカ(GPIO制御)まで出来たので、サンプルを流しておきます。
サンプルコード
android-things-samples/GpioAndroid at master ・ moonmile/android-things-samples
https://github.com/moonmile/android-things-samples/tree/master/GpioAndroid
バインディングプロジェクトを作る
プロジェクトは本体の「GpioAndroid」とバインディングプロジェクトの「GpioBinding」に分かれています。バインディングプロジェクトは、JarをラップするC#コードを自動生成してくれるプロジェクトですね。OpenCV for Android を Xamarin で使うときにも使います。
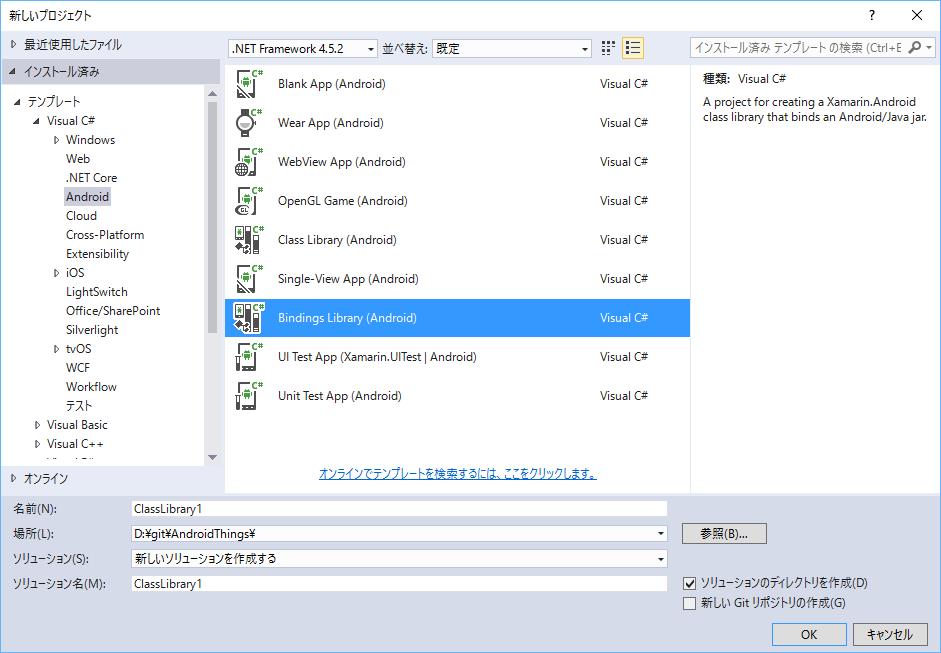
「Binding Library(Android)」でプロジェクトを作成すると、Jars フォルダなどが作成されます。
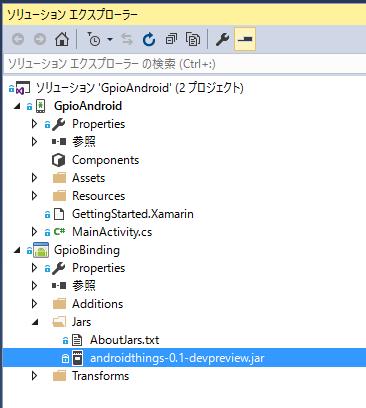
この Jars フォルダにバインドしたい Jar ファイルを入れます。ここでは、Android Things のバインドファイルの「androidthings-0.1-devpreview.jar」を入れておきます。このファイルは、Android Studio で Android Things プロジェクトを作るときにダウンロードしてきたものを使うのですが、サンプルコードにも入っているのでそのまま使ってください。
バインドするクラスやメソッドを調節するために、Metadata.xml ファイルに記述します。このあたりは、
jonpryor/SimpleAndroidThingsBinding
https://github.com/jonpryor/SimpleAndroidThingsBinding
を参考にしています。
<metadata>
<remove-node
path="/api/package[@name='com.google.android.things.pio']/class[@name='GpioDriver']/method[@name='close' and count(parameter)=0]"
/>
</metadata>
どうやら、Close メソッドがダブっているらしくそのままではビルドエラーになるんですよね。なので、このメソッドを無視するようにします。
本体のプロジェクトを作る
普通に Single-View App プロジェクトを作って、先の「GpioBinding」プロジェクトを参照設定します。
using Com.Google.Android.Things.Pio;
using System.Threading.Tasks;
public class MainActivity : Activity
{
TextView text1;
Gpio mLedGpio;
protected override void OnCreate(Bundle bundle)
{
base.OnCreate(bundle);
// Set our view from the "main" layout resource
SetContentView(Resource.Layout.Main);
// Get our button from the layout resource,
// and attach an event to it
Button button = FindViewById<Button>(Resource.Id.MyButton);
button.Click += Button_Click;
text1 = FindViewById<TextView>(Resource.Id.textView1);
PeripheralManagerService service = new PeripheralManagerService();
try
{
var pinName = "BCM4"; // RPi3
// String pinName = BoardDefaults.getGPIOForLED();
mLedGpio = service.OpenGpio(pinName);
mLedGpio.SetDirection(Gpio.DirectionOutInitiallyLow);
}
catch
{
}
var task = new Task(async() => {
while (true)
{
await Task.Delay(1000);
mLedGpio.Value = !mLedGpio.Value;
System.Diagnostics.Debug.WriteLine("led: {0}", mLedGpio.Value);
RunOnUiThread(() => {
if (mLedGpio.Value)
{
text1.SetBackgroundColor(Android.Graphics.Color.LightPink);
}
else
{
text1.SetBackgroundColor(Android.Graphics.Color.White);
}
});
}
});
task.Start();
}
private void Button_Click(object sender, EventArgs e)
{
mLedGpio.Value = !mLedGpio.Value;
}
}
書き方は、Windows IoT Core と似ていますね。
- PeripheralManagerService で IoT のサービスを作成する。
- service.OpenGpio で指定ピンをオープンする。”BCM4″ は 4ピンのことです。ここの名前は https://developer.android.com/things/hardware/raspberrypi-io.html に定義されています。
- GPIO の値は Value プロパティで設定します。
基本は、
Interact with Peripherals | Android Things
https://developer.android.com/things/training/first-device/peripherals.html
と動きを合わせちて、ループは.NETらしくTaskを使っています。画面に表示するときは、RunOnUiThreadを使うことを忘れずに。
バインドする androidthings-0.1-devpreview.jar ファイルですが、これはスタブファイルなので中身は空っぽです。実行時には、com.google.android.things が使われるように、Properties/AndroidManifest.xml に uses-library を追加しておきます。これをしないと実行時に PeripheralManagerService が生成できなくてエラーになりあます(かなりハマった)。
<?xml version="1.0" encoding="utf-8"?>
<manifest xmlns:android="http://schemas.android.com/apk/res/android" package="GpioAndroid.GpioAndroid" android:versionCode="1" android:versionName="1.0" android:installLocation="auto">
<uses-sdk android:minSdkVersion="24" />
<application android:label="GpioAndroid" android:icon="@drawable/Icon">
<uses-library android:name="com.google.android.things"/>
</application>
</manifest>
実行してみる
adb connect android.local で RPi 上の Android に接続して(WiFi経由で接続できます)、Visual Studio から実行すると次のように Lチカができます。
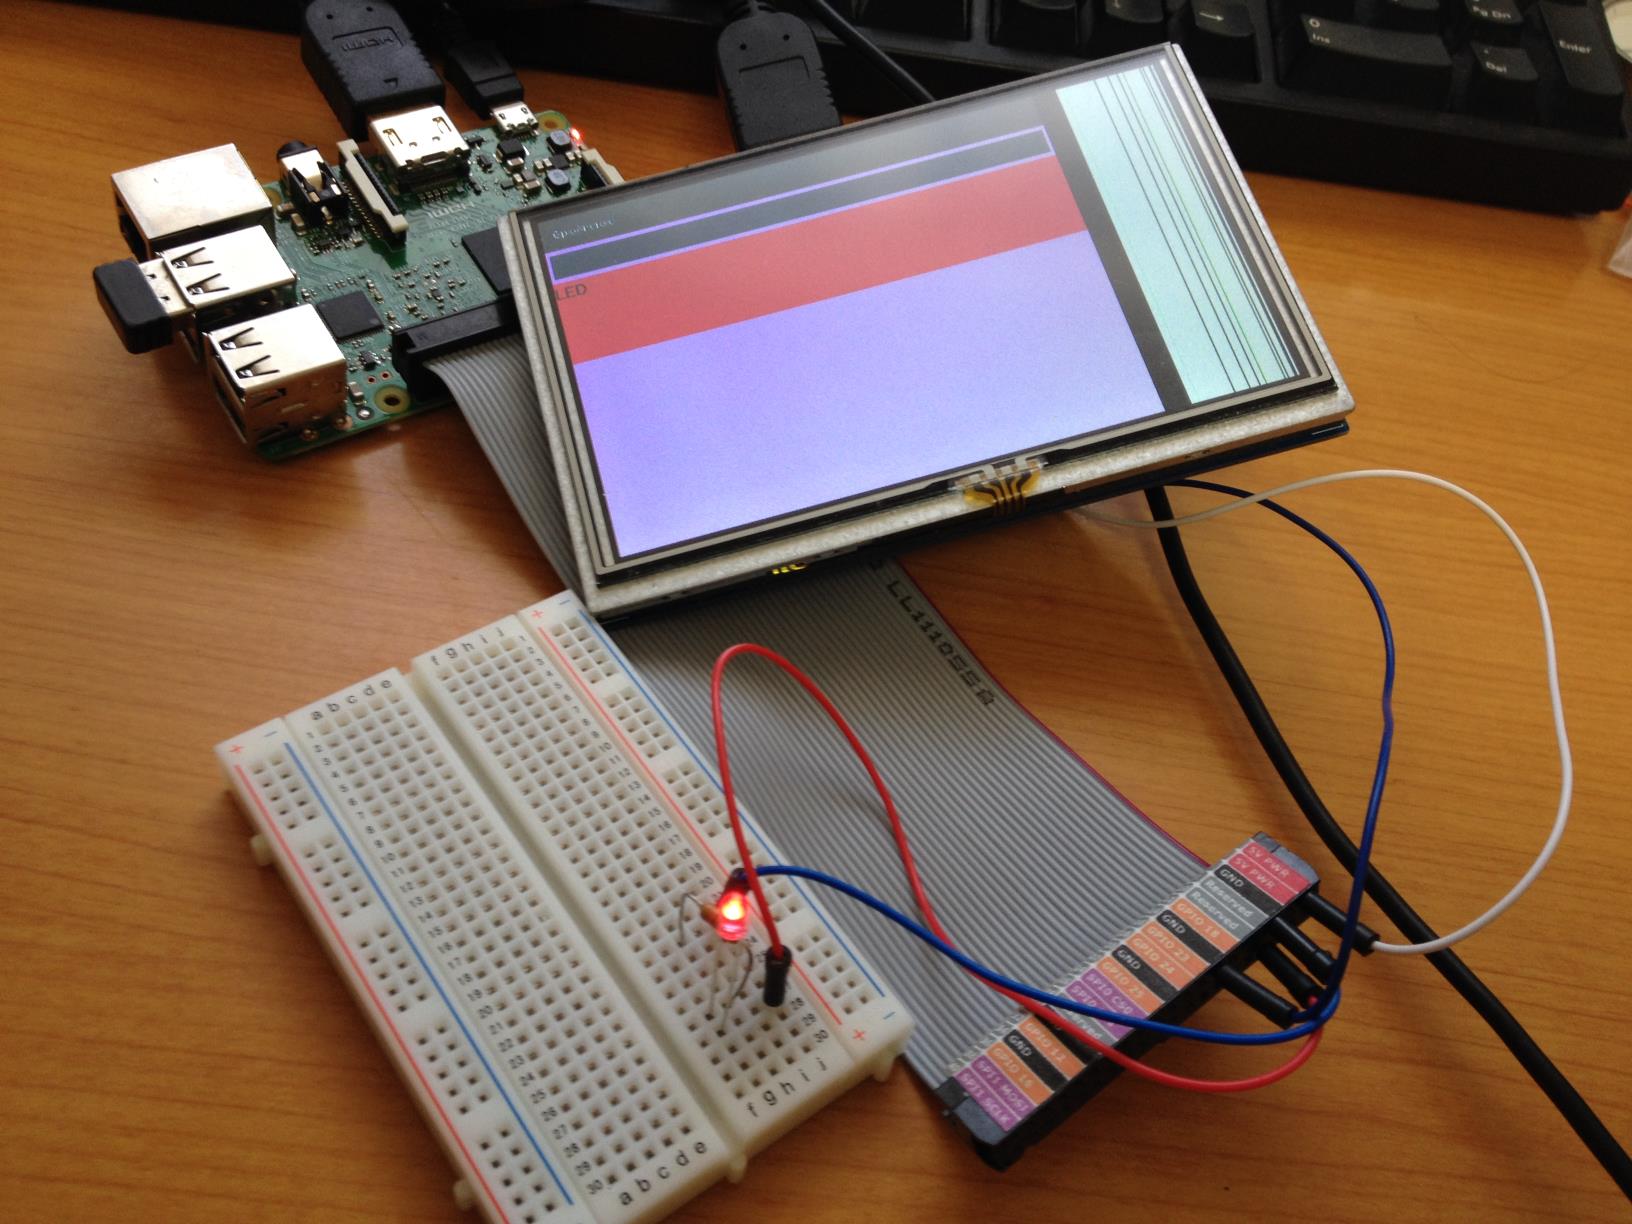
LED がチカチカとするのと同期して、画面のラベルの色が赤と白が交互に点滅します。